Introduction
Importance of the perfect wing in eyeliner application:
The perfect winged eyeliner is not just a makeup style; it’s a statement. This classic look has graced the eyelids of style icons throughout history and continues to be a favorite in today’s fashion landscape. A well-executed wing has the power to elevate a simple makeup look to one that exudes elegance and sophistication. Moreover, it has the magical ability to transform the eye shape, making them appear larger, more lifted, and more defined. Given its transformative potential, it’s no wonder that the perfect wing holds a revered spot in the beauty world.
The challenges many face in achieving it:
Achieving the perfect wing is often likened to an art form, and like all art, it requires skill, precision, and practice. Many makeup enthusiasts often find themselves grappling with uneven wings, smudged lines, or the daunting task of choosing the right product. Factors such as eye shape, skin type, and even hand stability come into play, making this seemingly simple task a challenge for many. This article aims to demystify the process, offering DIY hacks to make your winged eyeliner journey smoother and more rewarding.
The Basics of Eyeliner Application
Tools you’ll need for the perfect wing:
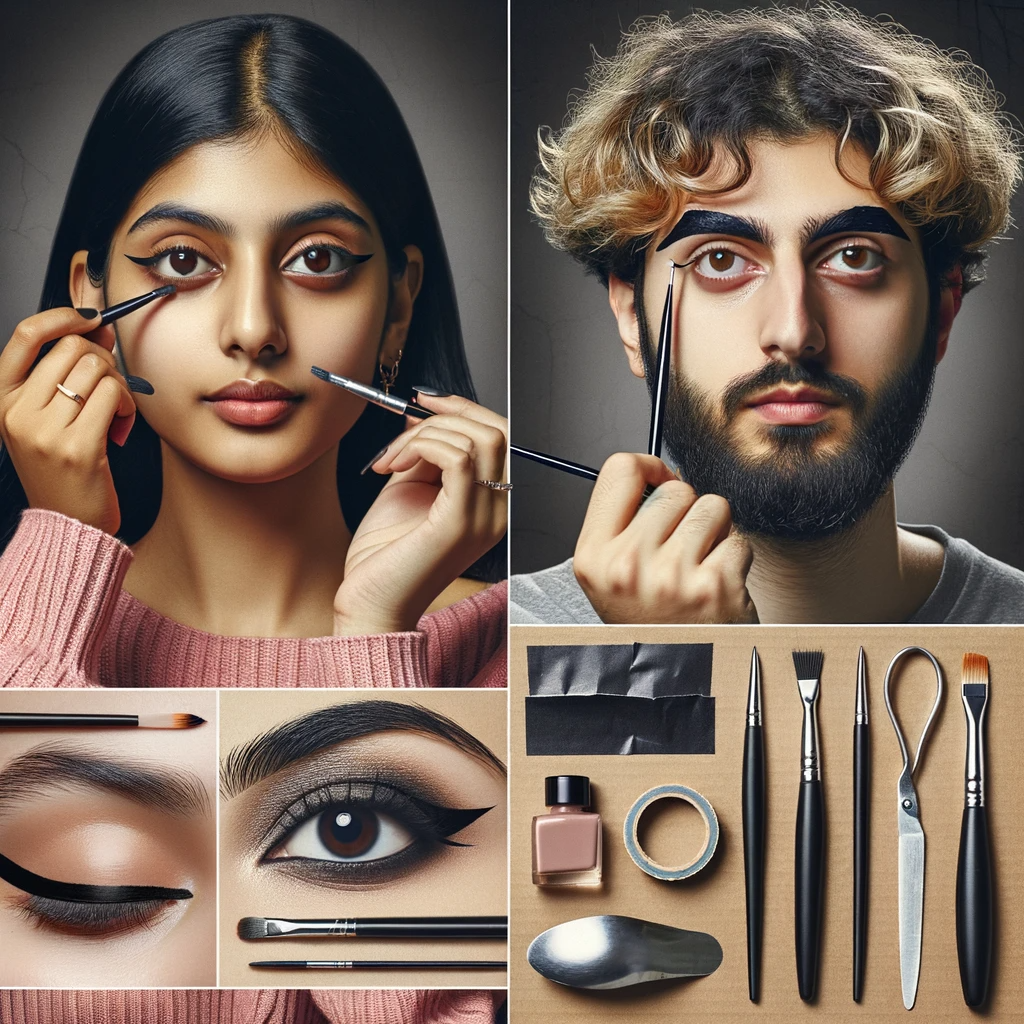
The saying “A craftsman is only as good as his tools” holds true when it comes to eyeliner application. Here are some essentials to have in your beauty arsenal:
Precision Eyeliner Brush: This brush has a fine tip, ensuring that your lines are sharp and sleek.
Angled Brush: Perfect for those who prefer gel eyeliners, this brush can also help in refining the wing’s tail.
Eyelid Primer: A primer sets the stage, ensuring that the eyeliner does not smudge or fade through the day.
Makeup Remover or Micellar Water: Essential for cleaning up any errors without disturbing the rest of your makeup.
Magnifying Makeup Mirror: Helps in getting a detailed view, especially if one has vision constraints or wants precision.
Choosing the right type of eyeliner for your skin and style:
When it comes to eyeliners, one size doesn’t fit all. Your choice of eyeliner can make a significant difference in the ease of application and the final look.
Liquid Eyeliner: Known for its precision, liquid eyeliner is perfect for those who want a sleek, sharp wing. However, it might be a bit challenging for beginners due to its fluid consistency.
Gel Eyeliner: This creamy consistency eyeliner offers flexibility in application. It’s great for creating both fine lines and bold strokes. Often available in pots, it requires an angled brush for application.
Pencil Eyeliner: Ideal for those aiming for a smudged, smoky look. It’s also beginner-friendly and can be used to sketch out the shape before going in with a liquid or gel eyeliner.
Felt-tip Eyeliner: These are pen-like eyeliners with a felt-tip. They combine the precision of liquid eyeliners with the convenience of a pencil.
Your skin type also plays a role. If you have oily eyelids, opting for a waterproof and smudge-proof eyeliner formula will be beneficial. On the other hand, if you have sensitive eyes, it’s wise to choose eyeliners that are hypoallergenic and free from irritants.
Step-by-Step Guide to the Perfect Wing
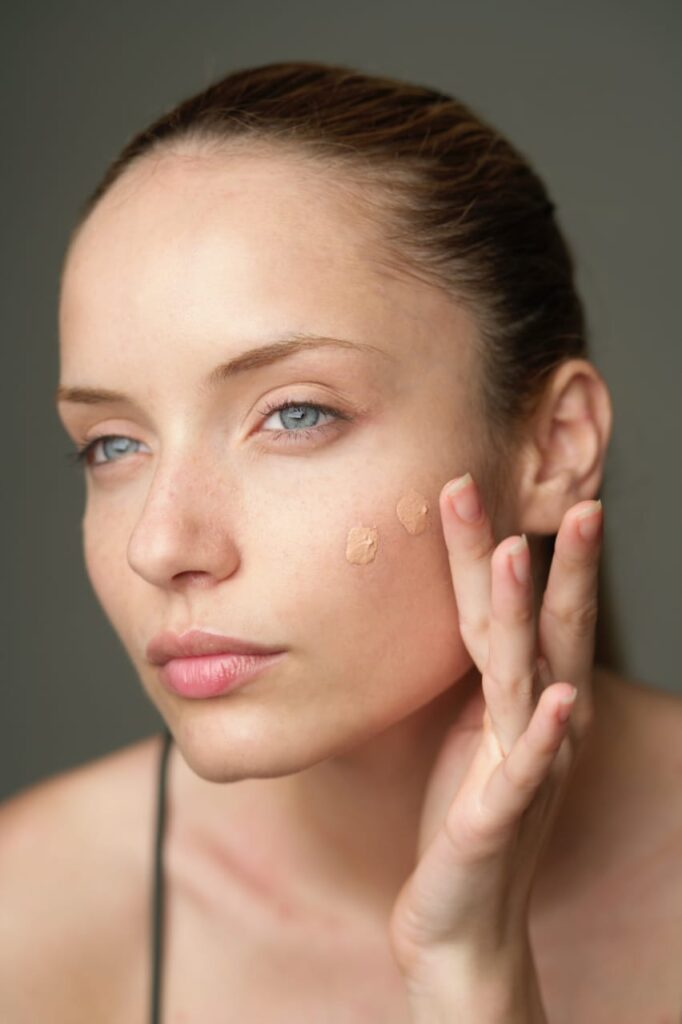
Starting with a clean canvas: Prepping your eyelids
Before embarking on your journey to achieve the perfect wing, it’s crucial to prepare your eyelids. Start with a clean surface, ensuring that there’s no residue of old makeup or natural oils. Use a gentle makeup remover or micellar water to cleanse the area. Once clean, apply a light layer of eyelid primer. This step ensures your winged eyeliner lasts longer, prevents creasing, and offers a smoother application process.
Mapping out your wing: Where to start and end
The foundation of the perfect wing lies in plotting its course. Begin by drawing a small dot where you want the wing’s tip to end—typically, this is angled towards the end of your eyebrows. Draw another dot where the liner should start, usually at the inner corner of your eye. Connecting these dots will provide a guideline for your winged eyeliner and ensure you get the symmetry right on both eyes.
The pull and drag technique: Ensuring a smooth line
When aiming for the perfect wing, smoothness is key. The pull and drag technique can be your best ally. Gently pull your eyelid taut by holding the outer corner. This provides a flat surface for easier application. Begin at the inner corner, dragging the eyeliner along the lash line and following the mapped-out guideline. The steadiness of your hand is crucial here, so take your time.
Filling in the blanks: Perfecting the winged look
After drawing the outline, it’s time to intensify the look. Go back in and fill any gaps or thin areas to ensure a uniform and bold wing. For a dramatic look, you can thicken the wing by adding more product, but always maintain the shape you’ve outlined.
Cleaning up any mistakes with a secret hack
Even makeup artists occasionally slip up. If you’ve made a mistake, don’t fret. Dip a cotton swab in micellar water or makeup remover and gently clean up the error. This “eraser” technique ensures your perfect wing remains sharp and flawless.
Common Mistakes and How to Avoid Them
Overextending the wing: Finding the right length for your eye shape
One of the most common mistakes in achieving the perfect wing is overextending it. The length of the wing should complement your eye shape. For almond eyes, a medium-length wing works best. Round eyes benefit from a slightly longer wing, while those with smaller eyes should opt for a shorter, subtler flick. The key is to experiment and find what enhances your natural beauty.
Uneven wings: Tips to ensure symmetry every time
Symmetry can be challenging, especially for beginners. To achieve even wings, always map out your eyeliner on both eyes before filling them in. This way, you can make adjustments early in the process. Another tip is to alternate between eyes as you draw segments of the wing, ensuring both sides develop symmetrically.
Choosing the wrong color: How to pick the perfect shade for your complexion
While black is a universal favorite for winged eyeliner, it might not suit everyone. For those with fairer skin tones, a brown or gray can offer a softer look. Olive and darker complexions can experiment with bold colors like navy or deep green. The rule of thumb is to choose a shade that complements your skin tone while also fitting the occasion.
Advanced Eyeliner Hacks for the Adventurous
The double-wing: A trendy twist on the classic look
Elevate your perfect wing to the next level with the double-wing technique. This edgy style involves drawing a secondary wing either just below or above the primary wing, adding a touch of drama to the eyes. To master this, start by drawing your usual winged eyeliner. Once done, draw a parallel line right above or below it, ensuring both lines are sharp. The space between the lines can be filled with a contrasting color or left as is for a minimalist yet striking look.
Adding a pop of color: Using bright eyeliners for a unique touch
While classic black or brown eyeliner is timeless, there’s a world of color waiting for those looking to make a statement. A colored perfect wing can elevate your look, making it fun and vibrant. Consider electric blues for a night out, or a subtle lavender for a fresh daytime look. When opting for colored eyeliner, keep the rest of your eye makeup neutral to let the wings shine.
Incorporating glitter or shimmer for special occasions
For those nights that demand a bit of sparkle, adding glitter or shimmer to your winged eyeliner can be the perfect touch. Use a glitter eyeliner or apply loose glitter over your perfect wing using a thin brush and setting spray. Ensure the glitter is cosmetic grade and safe for eye use. This shimmering touch is great for parties, festivals, or any occasion that calls for a touch of glam.
Taking Care of Your Eyes
Importance of using safe and clean products
Your eyes are not just the window to your soul; they’re sensitive and require care. When aiming for the perfect wing or any other eyeliner style, prioritize using products that are safe and free from harmful chemicals. Always check product ingredients and opt for eyeliners that are dermatologically tested. Outdated or expired eyeliners can harbor bacteria, so routinely check and replace your products.
How to properly remove eyeliner without damaging your skin
Removing your perfect wing should be as gentle a process as its application. Never rub or pull the skin around your eyes aggressively. Instead, use a soft cotton pad soaked in a gentle makeup remover or micellar water. Hold the wet pad over your eyelid for a few seconds, allowing the eyeliner to break down, then gently wipe away.
Recommendations for hypoallergenic eyeliners and removers
Sensitive eyes require special attention. Opt for hypoallergenic eyeliners that minimize the risk of irritation. Brands like Almay, Clinique, and Neutrogena offer eyeliner ranges suitable for sensitive eyes. Similarly, when it comes to removal, choose removers formulated for sensitive skin. Micellar waters with no added fragrance or harsh chemicals can be a good choice.
Conclusion
As we draw our exploration of the art of the perfect wing to a close, let’s revisit the top hacks that can help you elevate your eyeliner game:
Preparation is Key: Always start with a clean canvas by prepping your eyelids. This ensures longevity and a smoother application.
Mapping and Symmetry: Mapping out your wing provides a clear path for execution, ensuring symmetry and precision.
Adventurous Twists: The double-wing, bold colors, and glitter additions are trendy ways to redefine the classic winged look.
Eye Care: Using safe products, removing makeup gently, and opting for hypoallergenic alternatives are essential for maintaining eye health.
Mastering the perfect wing is undoubtedly a journey of trial and error, technique, and creativity. Remember that practice makes perfect. With each attempt, you’ll grow more confident, more steady-handed, and more in tune with what styles suit you best. So, don’t be disheartened by any initial mishaps. Embrace the process, learn from your experiences, and keep aiming for that show-stopping, perfect winged eyeliner look that turns heads wherever you go!
Frequently Asked Questions (FAQs)
- What are the top tools for achieving the perfect wing?
- The top tools include a fine-tipped eyeliner brush, a good quality gel or liquid eyeliner, and makeup remover or concealer for touch-ups. Some also find using tape or stencils helpful as a guide.
- Is there a difference between gel, pencil, and liquid eyeliners for winged looks?
- Yes, gel eyeliners often give a more intense and long-lasting look. Pencils are great for a smudged, softer wing, while liquid eyeliners provide precision and a sharp finish.
- How can I prevent my winged eyeliner from smudging throughout the day?
- Use a primer before applying, set with a translucent powder, and opt for waterproof eyeliner formulas.
- I have hooded eyes. How should I modify the wing for my eye shape?
- For hooded eyes, draw the wing while your eyes are open. This ensures the wing is visible when your eyes are open. Also, aim for a thinner line on the lid to avoid taking up too much space.
- What’s the tape method I keep hearing about?
- The tape method involves placing a small piece of tape at an angle on the outer corner of your eye, using it as a guide for your wing. After drawing the wing, remove the tape to reveal a sharp and clean edge.
- How do I fix a mistake without starting over?
- Dip a cotton swab into makeup remover or micellar water and gently clean up the error. Alternatively, use concealer to cover small mistakes.
- Are there new eyeliner products in 2023 that make achieving the winged look easier?
- Yes, there are always innovations in the beauty industry. Currently, there are eyeliners with stamp ends that allow for a quicker wing application, as well as flexible brush tips that adjust to your hand movement for better control.
- How do I choose the best wing angle for my eye shape?
- The tail of your brow can be a good reference point. Aiming the wing towards the end of your brow can create a flattering uplifted look. However, personal preference plays a big role, so experiment to see what you like best.
- Can I achieve a winged look with eyeshadow?
- Absolutely! Using an angled brush and a dark eyeshadow, you can create a softer, smudged winged effect.
- I find it hard to get both wings symmetrical. Any tips?
- Start by drawing small dots or lines as reference points on both eyes before drawing the full wing. You can also fill in the wings from the outer point inwards, ensuring both sides meet at the same spot on the eyelid.
Remember, practice makes perfect. The more you practice your winged eyeliner technique, the easier and more intuitive it will become!
Somebody essentially help to make significantly articles Id state This is the first time I frequented your web page and up to now I surprised with the research you made to make this actual post incredible Fantastic job